
Introduction
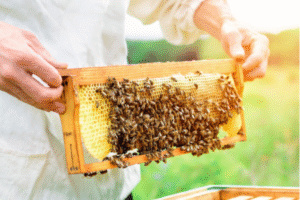
Honey bee farming is the process of extracting honey from colonies of honey bees, primarily Apis mellifera. It is an ancient practice that has been an essential part of agriculture and human nutrition for thousands of years.
Bees collect nectar from flowering plants, convert it into honey through enzymatic activities, and store it in their hives.
Beekeepers manage these colonies to ensure healthy bee populations and maximize honey production.
The honey production process includes setting up and maintaining beehives, monitoring bee health, managing seasonal activities, and harvesting and processing honey.
Modern honey production not only boosts the food supply through honey and wax, but also plays a vital role in pollination, benefiting ecosystems and agricultural productivity.
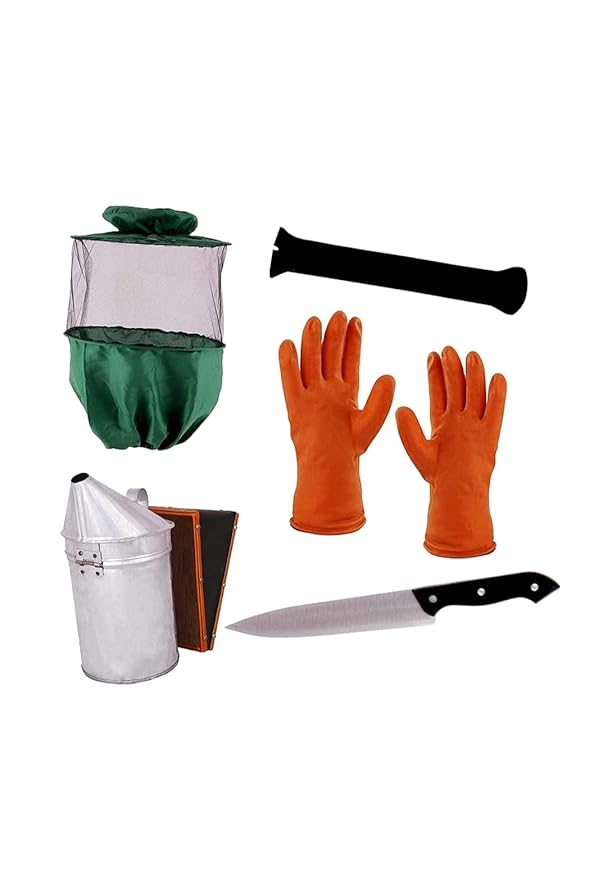
Table of Contents
Research and Learn
Honey production farming, also known as apiculture or beekeeping, is the practice of maintaining bee colonies, usually in man-made hives, to produce honey and other bee products such as beeswax, propolis, royal jelly, and pollen.
It is also important for pollination in agriculture and biodiversity conservation.
Choose a Suitable Location
Choosing the right location for your hives is one of the most important decisions in beekeeping. A well-chosen location can lead to healthier colonies, more honey production, and fewer management problems.
Here’s a detailed guide to help you for honey production choose the ideal location for your bees:
1. Sunlight Exposure
- Choose a location that receives morning sunlight. This helps the bees become active earlier in the day.
- Avoid too much afternoon sunlight in hot climates, as this can overheat the hive.
2. Shelter from Wind and Rain
- Bees perform better when they are protected from strong winds.
- Place hives near natural barriers like bushes, trees, or fences to keep them safe.
3. Clean Water Source
- Bees need water to cool the hive and dilute the honey.
- Make sure there is a source of clean water nearby or provide a source such as a shallow dish filled with stones.
4. Lots of Flowers
- Bees need nectar and pollen from flowers to survive.
- Choose an area rich in wildflowers, gardens, orchards or flowering crops.
5. Safe Distance from Human Activity
- Keep hives away from homes, schools, roads, and places frequently frequented by people or animals.
- This helps prevent unwanted stings or messes.
6. Dry Ground
- Avoid placing hives in damp or flood-prone areas.
- Make sure the hive is elevated slightly so it is drying and doesn’t touch structures or items.
7. Legal Requirements
- Check local beekeeping laws or zoning regulations.
- Make sure your bees don’t cause problems for neighbors.
8. Room for Expansion and Movements
Leave enough space around your hives for future additions and for ease of movement during inspections. Having clear access paths makes beekeeping work safer and more efficient.
9.Ease of Access
- Choose a location that you can easily access for inspection, feeding, or collecting honey.
- Avoid going to places that are too remote or difficult to reach.
Get the Right Equipment
Beekeeping can be a profitable business, but you will need the right equipment to get started successfully.
The right equipment not only makes your job easier but also protects you and ensures that your bees stay healthy and productive.
Here is a breakdown of the essential beekeeping equipment every beginner should have:
1. Beehive
The hive is the home for your bees. The most common type is the Langstroth hive, which is made of stackable boxes with removable frames.
It typically includes:
- Bottom board (hive floor)
- Deep brood boxes (for the queen to lay eggs)
- Honey supers (for storing extra honey)
- Inner cover and outer cover (for insulation and protection from weather)
2. Bee Suit
A bee suit that covers your entire body protects you from stings when working with bees.
A good suit should have the following:
- Thick cotton or synthetic material
- Elastic cuffs and zipper to prevent bees from entering
- Veil or hood to protect your face and neck
3. Gloves
Beekeeping gloves protect your hands from stings and maintain some flexibility for handling the components of the hive.
Leather or thick canvas gloves with long sleeves are commonly used.
4. Smoker
A smoker is an important tool for calming bees. When smoke is blown into the hive, it masks the alarm pheromones and reduces the aggression of the bees.
Use natural materials such as pine wood shavings or untreated burlap as fuel.
5. Hive tool
This multipurpose metal tool is used to:
- Separate the hive boxes and frames
- Scrape off excess wax or propolis
- Raise the frame for inspection
This is one of the most commonly used tools in a beekeeper’s kit.
6. Bee Brush
The bee brush has soft bristles and is used to gently remove bees from frames or surfaces without harming them.
This is useful during inspections or when harvesting honey.
7. Frame Grip (Optional but Helpful)
Frame grips help make lifting frames easier, especially when they are stuck or covered with bees.
This reduces the chance of damaging the hive or crushing the bees.
8. Feeder
Feeders supply sugar syrup to bees when natural food sources are scarce, especially in early spring or late fall.
Types include:
- Entrance feeders
- Top feeders
- Frame feeders (placed inside the hive)
9. Queen Excluder (Optional)
This is a mesh screen placed between the brood box and the honey super, which prevents the queen from laying eggs in the honey storage area.
Some beekeepers prefer not to use it depending on their management style.
10. Extractor and Uncapping Tools (For Harvesting Honey)
When it’s time to extract the honey
- The wax layer is removed from the honeycomb using a lid-opening knife or fork.
- The honey extractor rotates the frames to extract the honey without damaging the honeycomb.
Buy Bees
Beekeeping begins with one important step – purchasing bees.
Although it may seem simple, purchasing bees involves careful planning, understanding the different options available, and choosing a source that ensures your colony is strong and healthy.
Here is a unique and practical guide to buying bees for your apiary.
1. Know what you’re buying
Before purchasing bees, it is important to understand the types of bee packages available:
A. Package Bees
- It is usually sold in a closed box containing 2 to 3 pounds of worker bees and a caged queen bee.
- Ideal for beginners starting from the beginning.
- It must be installed in the hive manually.
B. Nucleus Colony (Nuc)
- This is a small, established colony consisting of 3-5 bees, brood, honey, and an egg-laying queen.
- It is easier to install and develops faster than packages.
- This is great for those who want to take a leading role in the development of the hive.
C. Full Hive
- A complete hive with an already established colony.
- It’s more expensive but less work for beginners.
- Usually available locally.
D. Capture a Swarm (Advanced)
- A free but risky option for experienced beekeepers.
- This involves gathering a wild swarm and transferring it to your hive.
2.Choose the Right Bee Breed
Different breeds have different temperaments and productivity
Italian Bees:
Gentle, productive, and great for beginners.
Carniolan Bees:
Known for their calm nature and ability to adapt to cold climates.
Russian Bees:
Resistant to mites but more aggressive.
Buckfast Bees:
A balanced choice with good disease resistance and productivity.
Ask your supplier about the strain you’re purchasing and how it suits your local environment and beekeeping goals.
3. Buy from reputable sources
Whether you buy bees online or from a local supplier, choose a reputable source:
- Look for breeders certified by beekeeping associations.
- Read reviews and ask for recommendations from local beekeepers.
- Make sure the bees are healthy, the queen is young, and she shows no signs of disease.
4.Timing Matters
Bees are usually available to buy in early spring. Order in advance – sometimes months in advance – especially if you are buying a nuk or package, as suppliers tend to sell out quickly.
5. Prepare Before They Arrive
Have your equipment ready before the bees arrive:
- Set up your hive in a suitable location.
- Have protective gear, smoking device, and tools ready.
- Plan to install them as soon as possible after pickup or delivery.
6.Transportation Tips (If Picking Up Bees
- Transport bees in a cool, ventilated vehicle.
- Avoid placing them in direct sunlight or a hot car.
- Handle it with care to avoid stressing the colony.
Setup the Hive
Place your hive on a stand to:
- Keep it off wet ground
- Prevent pests like ants or mice
- Find out the easiest way for inspection
Install the Bees
Depending on what you buy, installation varies:
Package Bees:
Put the bees in the hive and hang the queen cage between the frames. Allow the bees to release the queen naturally for a few days.
Nucleus Colony (Nuc):
Transfer all frames, including brood and bees, directly to your brood box. This gives the bees a head start.
Feed and Observe
In the early stages, especially in spring or when flowers are scarce, feed your bees sugar syrup (1:1 ratio of sugar and water).
Use a feeder appropriate to your hive design
- Queen activity and brood patterns
- Honey and pollen storage
- Hive cleanliness and bee behavior
Avoid Common Mistakes
- Avoid placing hives in low, shady areas that are humid.
- Avoid inspecting the hive constantly – check weekly or biweekly to reduce stress.
- Make sure the hive faces southeast or east to get morning sunlight.
Provide Seasonal Care
Understanding bees’ seasonal behavior and needs is essential to caring for them year-round.
Here is a detailed guide to seasonal bee care:
Spring (February–April)Colony Expansion and Swarm Prevention:
1.Stimulate Brood Rearing:
Feed colonies 1:1 sugar syrup to stimulate brood production and comb building, especially for new or weak colonies.
2.Inspect for Pests and Diseases:
Check regularly for varroa mites and other pests. Timely detection and treatment is vital.
3.Prevent Swarming:
Manage super consolidated roof space and consider splitting strong vents to minimise swarm hazard.
4.Monitor Food Stores:
Ensure colonies have adequate food stores until natural nectar sources become abundant.
Summer (May–July)Honey Harvest and Hive Maintenance:
1.Provide Adequate Ventilation:
Make sure the hives have good air flow so they don’t overheat. Providing a source of water nearby helps the bees regulate the hive’s temperature.
2.Monitor for Robbing:
During periods of nest shortage, minimize hive entrances to prevent nest plundering by other predators or wasps.
3.Harvest Honey:
Remove any excess honey to ensure there is enough left to nourish the bees.
4.Inspect for Pests:
Continue to monitor for pests such as wax moths and small hive beetles, especially in warm climates.
Autumn (August–October Preparing for Winter:
1.Assess and Consolidate Colonies:
Unite weak colonies to make them stronger enough to survive the winter.
2.Feed Colonies:
Provide sugar syrup in a 2:1 ratio to aid the bees in building winter storage.
3.Reduce Hive Space:
Adjust the hive location to suit the size of the colony, which will help the bees retain heat.
4.Install Mouse Guards:
Protect hives from rodents seeking warmth during the colder months.
Winter (November–January)Ensuring Survival:
1.Insulate and Protect Hives:
Use insulating materials to protect the hives from cold winds and maintain internal temperatures.
2.Monitor Food Stores:
Check the hive’s weight regularly to ensure there is enough food for the bees. Provide fondant or dry sugar if stocks are low.
3.Ensure Ventilation:
Prevent moisture build-up by ensuring proper ventilation in the hive, which is important to avoid condensation, which can harm the bees.
4.Minimize Disturbance:
Avoid opening hives in cold weather to prevent heat loss and stress to the colony.
By following these seasonal management practices, you can maintain the health and productivity of your bee colonies all year long.
Harvest Honey
Honey harvesting is a rewarding culmination of a beekeeper’s dedication, turning the bees hard work into golden sweetness.
Here’s a comprehensive guide to honey harvesting, ensuring both the quality of your yield and the well-being of your bee colonies.
🐝 Step 1: Determine the Right Time to Harvest
Harvest honey when at least 80% of the frames are covered with a thin layer of white wax, indicating that the honey has the proper moisture content and is ready for extraction.
Uncovered honey may have higher moisture levels, which can lead to fermentation if harvested prematurely.
🧰 Step 2: Gather the Necessary Tools
Make sure you have the following tools:
- Protective Gear:Bee suit, gloves, and veil to prevent stings.
- Bee Smoke is used for Calms the bees during hive inspection.
- Hive Tool is Used to pry apart hive components.
- Bee Brush for Gently removes bees from frames.
- Uncapping knife or Fork for Removes wax caps from honeycomb cells.
- Honey Extractor is use for centrifugal force to extract honey from frames.
- Strainer or Cheesecloth for Filters out wax particles and debris.
- Food-Grade Buckets or Jars for collecting and storing honey.
🏠 Step 3: Prepare the Extraction Area
Create a clean, enclosed space – such as a garage or dedicated honey chamber – to prevent contamination and keep bees away from extracted honey.
Make sure the area is well-lit and has surfaces that are easy to clean.
🍯Step 4: Remove Honey Frames
- Calm the bees: Use a smoke device at the hive entrance and under the cover to calm the bees.
- Open the hive: Carefully remove the outer and inner covers of the hive.
- Inspect the frames: Identify frames that are prominently covered.
- Remove the bees: Gently brush or shake the bees off of selected frames.
- Transporting frames: Place the frames in a covered container to prevent the bees from chasing the frames away.
🔪Step 5: Uncap the Honeycomb
Using an uncapping knife or fork, carefully cut the wax caps from both sides of the honeycomb cells.
Collect the wax cappings in a separate container; they can be processed into wax products later
🌀Step 6: Extract the Honey
Place the frame without the lid into the honey extractor. Operate the extractor according to its instructions, rotating the frame to extract the honey through centrifugal force.
The honey will collect at the bottom of the extractor.
🧼Step 7: Strain and Bottle the Honey
- Filter the honey: Pour the extracted honey through a sieve or cloth into a clean, food-grade container to remove any residual wax or debris.
- Stabilize the honey: Let the honey settle for a day or two to allow the air bubbles to come to the top.
- Bottle the honey: Pour the honey into sterilized jars or bottles and close them tightly.
Return Equipment and Support The Bees:
- Clean equipment: Thoroughly clean all equipment and extractors to prevent contamination.
- Returning frames: Place the removed frames back into the hive; the bees will clean out the hive and reuse it.
- Monitor the hive: Make sure the bees have enough honey stores for the upcoming season, supplementing with sugar syrup if necessary.
Govt Training and subsidy schemes:
Some government departments provide training programs and subsidy schemes for setting up a honey plant project:
- National Beekeeping & Honey Mission (NBHM)
- Khadi and Village Industries Commission (KVIC)
- Horticulture Departments under MIDH
- Krishi Vigyan Kendra (KVK)
- National Institute for Micro, Small and Medium Enterprises
- Gramodyog Vikas Yojana (GVY)
- NABARD
Conclusion:
Government initiatives and training programs have further helped in the adoption of beekeeping, making it accessible to rural communities and small-scale farmers. As the demand for natural and organic products continues to grow,Beekeeping is a viable and profitable agricultural business, contributing to both economic development and environmental sustainability.
Also Here are some good agriculture related business ideas:
7 thoughts on “Honey Bee Farming”